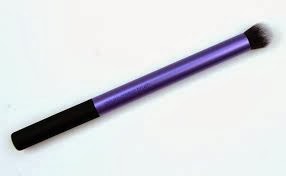
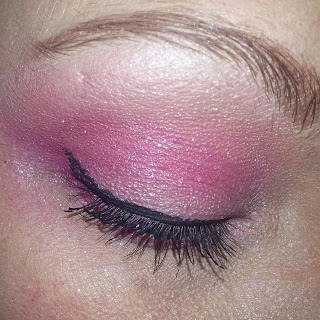
First, let's talk about blending. The trick to blending properly is having the correct tool for the job. I use Real Techniques eye brushes. The shader brush is perfect for applying the colour, then their deluxe crease brush is perfect for all those blending jobs. I got mine at Walmart and they are really, really affordable.
You should start with a crease-free eyeshadow primer, like Urban Decay Primer Potion, or even a gorgeous cream eyeshadow like Maybelline Colour Tattoo. Just make sure whatever you use isn't going to crease up under your shadow. Primer will give you a smooth canvas, and will also provide a base for the colour to stick to.
Using a flat shader brush, be sure to pat the colour onto the lid, instead of sweeping it across the eyelid, to get the best colour payoff from your eyeshadow. We'll go into what kinds of colours to use where in the contouring section later.
 The most important thing I can tell you about blending is to ALWAYS USE A CLEAN BRUSH TO BLEND WITH. I like to keep a makeup wipe on my counter top to clean my blending brush with as I go.
Blend in small, circular motions, taking care to work on top of your shadow, and not into it. Don't press down hard, as the eye area is very delicate, and also the crease/blending brush is designed for just the tips of the fibres to be used to gently blend the eyeshadow together.The finished look should be seamless, with no harsh lines of colour anywhere. The more you blend, the smoother the look, and depending how you want your makeup to end up looking will dictate how much time you need to spend on blending it out. You can always go back in with more colour to even out your look as you blend.
Eye contouring is a really great way to create gorgeous eyeshadow looks that really pop, and the basic eye contour has become a staple of makeup culture today.
We start with the lightest colour we're going to use, highlighting under the brow bone, to give depth to the eyes, and into the inner corner, to make the eyes look slightly larger and set wider apart (if you have large, wide-set eyes, this step will be one you'll like to skip). Next, the main colour you would like to feature in the look goes in the middle of the eyelid. You can see a really great example of this in the purple look here. I also like to use this colour, or a slightly lighter tone, up into and above the crease, blending it into the brow highlight as a "transition" colour.
 Last of all, for a simple look with eye contouring, use the darkest colour you're going to use, forming a triangular shape into the outer corner of the eye, and sweeping it up and into the crease, once again to add depth to the eyes and make them pop a little more.
Once you're done with the upper lid, depending on your look, you can also use an eyeliner brush (I prefer to use an angled push liner brush for more precise placement) to place some of your eyeshadow colour along the lower lashline. This is particularly nice if you're going for a nice smoked-out look.
Apply eyeliner and mascara as you wish, and your eyeshadow look is done!
A couple more tips now, to deal with fallout (powder falling from the brush as you use it, onto your cheeks).
If you're using really powdery shadows that do fallout a lot, start with your eye makeup, then do a cleanup with makeup wipes and apply the rest of your face. This isn't hard to do, and once you've tried it a couple of times, you'll find it easy.
Alternately, if we're just dealing with a tiny bit of fallout, use a large, soft brush to gently brush the powder away, being careful not to streak it all over your face. If you do happen to make a mess of it, you can always use makeup remover wipes to clean up and simply reapply makeup over the area.
Practice, practice, practice! It's only makeup! It washes off. If you mess it up you can try again. That's one of my best things about makeup, and why I love it so much. You can do anything you want to do, create anything you want to create, and at the end of the day, the canvas is clean to start again!
.jpg)


No comments:
Post a Comment