Showing posts with label trendsday. Show all posts

Wednesday, 6 March 2013

Trendsday - Gimicky nail art

I don't know what it is about painting really funny, cute, gimmicky things on finger and toe nails, but it seems to be quite the trend lately, and one that I'm really enjoying.

It started probably 6 months ago, and as more and more products for producing good quality nail art are released, it's catching on more and more.

My advice, when you're looking for good products to use for nail art, is to invest in some good striper polishes and practice with them.
 "Good" doesn't always mean high priced, and there are some really great options for under $10 each, including CM, BYS and pretty much any other brand that does a dedicated art polish with a very thin striper brush.

You can, of course, use nail art brushes with your normal polishes. Be sure to clean them really well between uses.

So what sort of ideas do we have for cute, funny nail polish, and where do we find more ideas?

Well, first of all, there's the Tigger tutorial on my Youtube channel ( www.youtube.com/katysbeautysecrets ).
 Then there's the ever-popular patriotic-type nails with union jacks and stars, like the ones I did for Australia day. I'm actually going to do an American version very soon.

I think I told you guys a few weeks ago that I was growing off my acrylic nails, which I did, and now I'm just waiting for the natural nails to grow a bit more before I do some more tutorials for you.

If you have short nails or you can't wear crazy polish to school or work, there is always another option.
You could try a cute pedicure, which will be hidden inside your shoes for the daytime, but will keep you entertained once your shoes come off, like my cookie monster pedi above!.

I'm always looking for nail art ideas, and the majority of my ideas come from online and Instagram. I have inherited my dad's knack for copying things, and it extends to most areas of my creativity. The techniques used are very simple, though, and once you master the art of the nail art brush, the world is your oyster. Enjoy!


Wednesday, 20 February 2013

Trendsday: Bold lips!


 This season there's a great trend of bold lips! I am personally LOVING all the amazing new shades that we're seeing out and about.

The thing to remember about wearing a bold lip is not to go overboard with the eye makeup. You don't want to end up looking like a clown or an '80s throwback.

Here are a few examples from my personal collection.

How about you? Do you love the bold lip trend? Would you/do you wear it?


Wednesday, 13 February 2013

Trendsday: Contouring.

Lately, there's a big trend towards using highlighting and contouring to completely change the perception of your face shape.
Personally, I like it. I love that I can adjust the shape of my nose depending on the kind of contouring I want to do, or that i can make my face appear slimmer instantly using really simple techniques.

Kim Kardashian is pretty much the queen of contouring. She uses mega highlighting and contouring with different shades of concealer under her base to create the look that she's famous for.

Here's a diagram of the areas that Kim highlights and contours, and it's a pretty good guide for anyone wanting to do a bit of facial sculpting without going under the knife.

You can use a very light and a very dark concealer under your base, or you can go with powders (a highlighter and a bronzer) over the top of your makeup. Go easy on the powder, though. It's easy to add more colour, very difficult to take it away once it's on there.

Give it a go and see what you think. Contouring isn't for everyone, but it's fun to try out, or to use for a special occasion if you don't like to spend a lot of time on your everyday look.

Wednesday, 30 January 2013

Trendsday: Storage

Looking at my current storage "solution" for nail polish, it's becoming clear that a new solution is needed, and fast. My mother loves my overflowing "Frequent Flyer" overnighter, because every time I can't close the lid, I do a clear out and give her a bunch of polishes.

I'm not as happy with the arrangement. I'd really like to have a proper storage space for my polishes so that I can see what I've got and not have them all clinking around up against each other, upside down and all over the place.
Pic via Pinterest

A lot of beauty people are using storage shelves like you'd see at a nail salon, but I'm not sure that's a great option for me. My kids are awesome, but I feel like they would both get into the polishes if they were left out on display, and I REALLY don't want my lovely new carpet to meet with an unfortunate incident involving nail polish.

Likewise, an open drawer that anyone can look into at any time will be problematic.

However, I do have a double-door cabinet under the bathroom sink that I feel I could install a lock on. There are 2 shelves in there that I usually keep my hair styling tools and  box full of extra things, doubles of makeup, eyelashes I haven't opened/used yet, new packets of sponges, that kind of thing.

I'm sure all of the things that are currently residing in there could be relocated or moved to the bottom shelf, freeing up the top for my nail polishes!

I'll keep you all updated with how it goes, and post pics once it's done. Tell me, how do you store your nail polish collection?

UPDATE: I got motivated and did the under-sink storage immediately after I posted this blog. Here's the result:

Glitter polishes at the back, then nail art stripers, then metallics, top and base coats up one side, and crackle/shatter finishes up the other, then organized by colour.

I'm still not 100% happy with the way it's organized, but it's definitely better than the bag they were all rolling around in.

Wednesday, 9 January 2013

Trendsday: Lips'n'tips

Colour blocking is officially done, over with, goneski from the trends of 2013.

What's stepping into its place? The old "Lips'n'Tips" from the 50's! Matching lipstick to your nail and toenail polish for a refined look.

I, personally, couldn't be happier! I loveovelove anything retro that dates back to the 40's and 50's, and this is no exception.

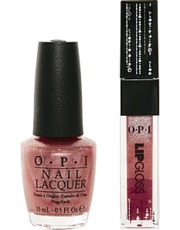
Two notable brands who have hopped onto this trend right from the start, and they have both released lips'n'tips packs so we don't have to go searching for perfectly matched lipglosses and nail polishes.

OPI and Butter London have got some really gorgeous matchy-matchy colours for us to try. I was checking the OPI ones out this week in my local beauty supply store and I am having a hard time choosing just one. It may need to be a double feature!

I'll pop a review up once I have tried them out. I haven't tried lipgloss from OPI, but I did used to use their Avoplex lip treatment before they discontinued it, and LOVED it.

What do you think of the new lips'n'tips trend?


Wednesday, 19 December 2012

Trendsday: Christmas nails!

Everywhere I look, I'm seeing christmas-themed nail looks, so it's fairly obvious what today's Trendsday post needs to be about, isn't it?

Here is my holiday-themed look for you guys, a cute silver polish with a statement thumb nail, decorated with a christmas tree, star and all!

This is a fun little look that virtually anyone could do with the right combination of polishes.


What fun looks are you doing to celebrate the holidays?


Wednesday, 5 December 2012

Trendsday: Skyfall - Vintage Glamour

Who else is excited about the new Bond movie, Skyfall? I haven't seen it yet, but the accompanying beauty trends (OPI's nail collection, Adele's beautiful music video, Severin's gorgeous style) scream vintage glamour.

The smoky eyes, lashings of liquid liner and mascara, and full, deeply coloured lips are all staples of this fantastic era in beauty, and I love to recreate it myself at any opportunity.

Here's a look I have put together in my interpretation of vintage glamour and what it means to me.


If you want to learn how to do this look, tune in to the tutorial here: http://www.youtube.com/watch?v=h6VZ_Y5eCuA

Wednesday, 28 November 2012

Trendsday! Katy's new trend-midweek pamper sessions

While I was putting together my posts for this week, I had to think about which products to review, what to make videos about, what to do a tutorial about for How-to Monday and which beauty trend I would cover for Trendsday...but then I got to thinking. What if I start my own trend this week?

So...at the risk of increasing my workload yet again, I'm going to introduce a new segment to my blog and post it on Wednesday evenings after you guys have had a chance to read the Wednesday Trendsday post. The midweek pamper session will focus on a different pampering method each week and hopefully I can get you all inspired to take time out for yourselves once a week to break up the boring work week and make it a bit more enjoyable.

Most of my pamper ideas will take 30minutes to an hour of your Wednesday evening, and will have you feeling absolutely lovely! I'll also try to feature some products that I love to use for each pamper as I go, so that you guys can get a feel for what I like to use to make me feel happy and relaxed.

I'll try to include pampering sessions that are relevant to both my readers in the Southern Hemisphere, where we are heading into summer, and my readers in the Northern Hemisphere, where winter is fast approaching.

Stay tuned this evening for my very first Midweek pamper session!

Wednesday, 21 November 2012

Trendsday - Mattify your nail looks!

Matte nail polish is becoming a craze everywhere I look, and in my explorations on the interwebz this week, I came across some amazing ideas for nail art that mix trends, products and techniques, so I decided to give one of them a red hot go.


First of all, I want to show you how I found matte nail polish. I went looking for an actual black matte polish, and instead left the store with ChiChi matte top coat, which means that any solid colour nail polish that I have in my collection is now potentially a matte polish too! You just paint on your normal colour. I used the black from OPI's so so skullicious collection, and just used the matte top coat like I would any other top coat. It's super fast-drying and super effective, giving me exactly the effect I was after.

On my ring finger, I painted a blue and purple coloured glitter polish, as I am going for a stand-out one nail different trendy look.

Then, on top of all of my nails, I used my BYS nail art polish in black to create a criss-cross pattern.

Last of all, a coat of regular top coat over the ring fingers to seal the glitter. DO NOT use regular top coat over the matte top coat because you will make it shiny and undo all your hard work.

Here's what the finished product looks like:


What do you think? Do you like the subtle nail art?

Wednesday, 14 November 2012

Trendsday: Brown smoky eyes.

I'm seeing this everywhere at the moment, especially in the northern hemisphere, where they are heading into Autumn and winter. The brown smoky eye!

Constructed in the same way as the classic smoky eye, but using brown and bronze shades to create a softer look, this is actually something I've been doing for as long as I have had my Urban Decay Naked 2 palette.

Try it out for yourself, using your brown shadows and good coat of black liquid liner and mascara!

Wednesday, 7 November 2012

Trendsday: Melbourne Spring Racing looks

First, let me apologize for how late this post is going up. Life has a way of making us busy, and today was exceptionally so.

Here in Melbourne, we are celebrating the Spring Racing Carnival, and I've put together a couple of looks for race-going fillies.

First, a rather nude look, with a bronze smoked eye and my lovely tan and orange dress, with a messy up-do, a rather casual version of a french roll:
Then we have a look to match my new electric blue party dress, which is super light and comfy, perfect for the races, with the on-trend sock bun included, and just to be cheeky; a Gangnam Style- inspired manicure:
I'm all about matching the makeup to what you're wearing if you're going to go with a colour theme, and as always, the most important thing is not to go overboard and ruin the look completely.

What do you think?

Wednesday, 31 October 2012

Trendsday: the sock bun.

I am seeing "the sock bun" everywhere! Even JLo wore one at the Oscars this year!

My hair is still very short (just sitting on my shoulders now), so I'm going to slip in some extensions to try this with. My apologies for any visible clips or hair-colour-not-matching type faux pas.

So what you need to make a sock bun is:
A pair of scissors
A sock that you really don't want any more (a clean one!!!!)
Bobby pins
Hairspray
A hair elastic
A little bit of patience

Cut the toe end off the sock, and throw it away. Then roll the sock tightly into a bagel-type shape.
Next, secure your hair into a high ponytail with the hair elastic, making sure to smooth out the hair on the top of your head (you can tease, or use some Umberto Giannini Backcomb in a bottle if you want a little more volume on top).
Put the end of your ponytail through the middle of your sock-bagel, and start to roll it down the length of your hair, spreading the ponytail out and covering the sock-bagel as you roll it. (If you're having trouble with these instructions, I'll pop a youtube tutorial up in the next few days. Let me know if you want me to do it.)
Once you get the sock-bagel all rolled up inside the hair and sitting close to your head, just secure it in place with a few bobby pins and give it a spray with your favourite hairspray. I've used Fudge Urban Vanilla Raspberry hairspray.
Et Voila! That's it! The sock bun! Give it a try, tell me how you go! Mine turned out a bit messy, but with practise, it becomes easier to do it neatly. FYI, this was the first time I'd tried this.

Wednesday, 24 October 2012

Trendsday: Tanning

To tan, or not to tan? That is the question. Leading into the summer months, it's the question on everyone's lips. When it comes to tanning naturally, the health-smart answer is NO! So that leaves us with artificial tanning products, or staying pasty-pale.

I've done both. I will admit that in my very early 20's, when I got married, I spent a great deal of time in a solarium baking myself, which I realize now has put me at an increased risk of skin cancer. All because I was getting married in Queensland and "you can't go to Queensland paler than a ghost!".

Faking it at my brother's wedding
For my brother's wedding, it was a different story. I went the spray tan route. Although it came out ok, and was very even and nicely done, it's really not quite a natural human-looking colour and so I generally now just opt for the pale look. These days, it's definitely not frowned upon to be pale in Australia, because everyone knows the harmful effect of the sun's rays, and it's almost a 50/50 split between people who fake it and people who don't want to.
Add caption
So...for those of you who want to fake it, the best way to do it is to fork over the money and have a professional spray you. You need to do an all over exfoliation before your tan and moisturize well in the couple of days before you have it done. Invest in a really nice body scrub, like Puretopia glowingly smooth body polish (I LOVE this product, and I don't even tan), available at Priceline, Big W and a whole bunch of different pharmacies to keep your tan  even as it wears off.


Pale and natural, enjoying a...
lemonade in the pool
And for those of us who prefer to stay on the pale side, all you need to invest in is some great sunscreen!

Either way, it's important to keep your skin well hydrated and nourished during the summer months to keep your skin healthy and looking its best. I got an awesome product in the September bellabox from You, me and every body, which was a body mousse, kind of a foamy, light moisturiser that goes a long way and soaks into the skin so easily. It's really lovely and really affordable. Definitely one to try out.


So... tell me, do you tan or stay pale?

Wednesday, 17 October 2012

Trendsday: Pink blush

It's spring here in Australia, and I'm seeing lots of lovely springtime makeup looks around, most of which include some shade of pink cheek. This is perfect for me, because I am a pink blush lover and have all the shades of pink to show you!


For a pink cheek to work, it's best to use the blush on the apples of the cheeks and sweep upward towards your ear, and not really focus it under the cheekbone. Pink tends to work well as a highlighting colour, and using it in a contour area will just leave you looking a little clownlike.

The other trick to pink blush is to keep it light, especially in spring and summer. We want to keep the look fresh. Also, be aware of your natural skintones. For some people, a pink blush just isn't going to look nice, and they should stick to more bronze-y shades. It's all about finding what looks best on your skin, not just about following a trend no matter how silly it looks on an individual.

One gorgeous little secret weapon I have in my collection is a little bottle of MAC lustre drops in Pink Rebel. It's gorgeous as a highlighter and gives a subtle wash of pink with it. I use this regularly along the top of my cheekbones, just above the blush, for an added dimension.


Wednesday, 26 September 2012

Trendsday! Ombre makeup.


A big trend out at the moment is Ombre. Whether it's eyes, lips or nails, or even hair, everyone seems to be getting in on the Ombre trend.

So first, a little bit about the history of Ombre. The word itself means "shadow" in french, and has long been used to describe gradual colour change dyeing processes. Since the 20's, it has been a popular effect used in dyeing fabrics for dresses, skirts and all sorts of things.
It made a comeback of sorts in the 1960's and 1970's, with the introduction of tie-die, and morphed into a changing of colours on a brighter and more contrasting level.

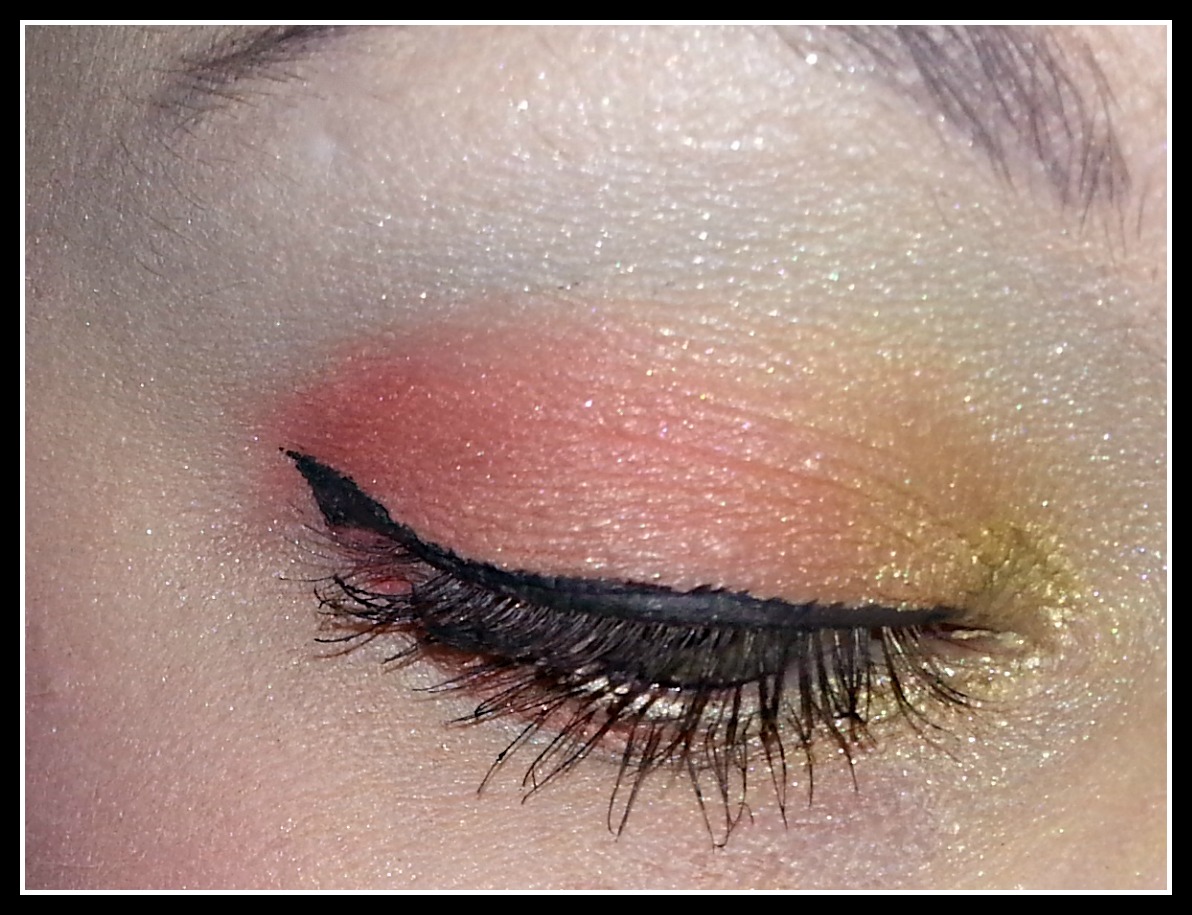
These days, Ombre can be anything from a gradual fade of shades in the same basic colour, as you can see with my lips and nails here, or a combination of colours next to or opposite each other on the colour wheel, as seen with my sunset-inspired Ombre eye.

However you decide to do it, the key is to blend everything together really well so that you don't have an obvious line separating your colours. Even if they are real opposites, they should still be blended together in the edges, to create that effect.

Here,  I've created my look with nail polishes by OPI (way too many colours to list), OCC lip tar and NYX pearl pigment, and various colours from my 120 Pro palette.

What do you think? Do you like the Ombre look? Do you hate it? Let me know your thoughts.