Showing posts with label nail polish. Show all posts

Sunday, 4 August 2013

OPI Special Breast Cancer awareness pack

Every year, I can't wait for the special OPI pack that finds its way into stores in September or October for the National Breast Cancer Foundation. Pink of Hearts is a pack of two nail colours, full sized and in the pink theme, this year with bonus nail stickers and crystals, which you can find in David Jones from September 13 at $24.95.
100% of profits from the sale of these packs is donated to the National Breast Cancer Foundation, a cause close to my own heart, as I have several family members who have fought and won the battle with breast cancer.

Pinking of you
More than a glimmer
My mum's older sister, my Paternal Grandmother, my Dad's younger sister, and my "adopted" mum, who is my close friend's Mother, have all done battle with the dreaded Breast Cancer beast, and I am particularly mindful of checking myself out regularly. Early detection is our greatest weapon in the fight against Breast Cancer, while the research continues in hopes of finding a cure or prevention. OPI are continuing to help out with that every year, and for that, I applaud them.


Quite aside from the awesomeness of their cause, who needs an excuse to go and buy a couple of new nail polishes!?!?
I will definitely be out to get mine when they hit the stores next month, make sure you keep an eye out for them too.

In the meantime, here are some pics of last year's Pink of Hearts colours, "I think in pink", and "You glitter be good to me", and some arty ideas I had for their use.


Wednesday, 6 March 2013

Trendsday - Gimicky nail art

I don't know what it is about painting really funny, cute, gimmicky things on finger and toe nails, but it seems to be quite the trend lately, and one that I'm really enjoying.

It started probably 6 months ago, and as more and more products for producing good quality nail art are released, it's catching on more and more.

My advice, when you're looking for good products to use for nail art, is to invest in some good striper polishes and practice with them.
 "Good" doesn't always mean high priced, and there are some really great options for under $10 each, including CM, BYS and pretty much any other brand that does a dedicated art polish with a very thin striper brush.

You can, of course, use nail art brushes with your normal polishes. Be sure to clean them really well between uses.

So what sort of ideas do we have for cute, funny nail polish, and where do we find more ideas?

Well, first of all, there's the Tigger tutorial on my Youtube channel ( www.youtube.com/katysbeautysecrets ).
 Then there's the ever-popular patriotic-type nails with union jacks and stars, like the ones I did for Australia day. I'm actually going to do an American version very soon.

I think I told you guys a few weeks ago that I was growing off my acrylic nails, which I did, and now I'm just waiting for the natural nails to grow a bit more before I do some more tutorials for you.

If you have short nails or you can't wear crazy polish to school or work, there is always another option.
You could try a cute pedicure, which will be hidden inside your shoes for the daytime, but will keep you entertained once your shoes come off, like my cookie monster pedi above!.

I'm always looking for nail art ideas, and the majority of my ideas come from online and Instagram. I have inherited my dad's knack for copying things, and it extends to most areas of my creativity. The techniques used are very simple, though, and once you master the art of the nail art brush, the world is your oyster. Enjoy!


Wednesday, 6 February 2013

Trendsday: Textured nail polish.

Last week, I showed you a sneak peek of OPI's new Great and Powerful Oz collection, and I touched on the awesomeness of their new Liquid Sand technology, which essentially leaves a texture on your nails like very fine sandpaper, with a matte finish.

As you can see in this first picture, the Liquid Sand polishes also have a kind of shimmer to them, making them truly unique and really awesome to look at.

These two colours are "Can't let go" and "Get your number" from the Mariah Carey collection that was recently released. They have chunks of glitter in them (of course!) and the Liquid Sand matte finish. I'm kind of in love with these Liquid Sand polishes. There isn't a bad shade, and there are lots to choose from, so you'll find a colour to match any outfit or occasion.


The next colour I've shown here is actually not done justice by the picture. The polish is an almost-sheer black with red glitter, and of course that awesome Liquid Sand matte finish. This polish is going to feature in my birthday OOTD video on Friday night (Which I'll post on Saturday for you guys), because it's the perfect accessory to my gorgeous black ruffle tunic from City Chic (which I'll be wearing as a gorgeous dress, all dressed up with some sexy shoes, it's perfect for summer special occasions!).

This is another colour from the Mariah Carey collection, called "Stay the night".

Last of all, we have the gorgeous bronzey-gold Liquid Sand polish from the Great and Powerful Oz collection called "What wizardry is this?". I've teamed it up for a funky geometric look with the nude from the same collection, called "Glints of Glinda".

I actually think this is my favourite "everyday wear" colour in their Liquid Sand polishes. It's got a shimmer, rather than a glitter, and it is just a really great allrounder colour, it goes with any outfit, so you can wear it all week to work before you let your hair down with one of the glitzier colours on the weekend. Definitely my pick of the bunch.

The last thing I want to tell you about this polish is that, unlike other glitter polishes, it's really easy to remove! I know a lot of you steer clear of glitters because they are so notoriously difficult to remove, but you need not be scared of this one.

So... what do you think of OPI's LiquidSand polishes? You can get some for yourself from leading salons and David Jones nationwide.

Full disclosure: The awesome people at OPI sent me these polishes to try out, but of course my opinions are always my own, and I was not paid for this review.

Wednesday, 30 January 2013

Trendsday: Storage

Looking at my current storage "solution" for nail polish, it's becoming clear that a new solution is needed, and fast. My mother loves my overflowing "Frequent Flyer" overnighter, because every time I can't close the lid, I do a clear out and give her a bunch of polishes.

I'm not as happy with the arrangement. I'd really like to have a proper storage space for my polishes so that I can see what I've got and not have them all clinking around up against each other, upside down and all over the place.
Pic via Pinterest

A lot of beauty people are using storage shelves like you'd see at a nail salon, but I'm not sure that's a great option for me. My kids are awesome, but I feel like they would both get into the polishes if they were left out on display, and I REALLY don't want my lovely new carpet to meet with an unfortunate incident involving nail polish.

Likewise, an open drawer that anyone can look into at any time will be problematic.

However, I do have a double-door cabinet under the bathroom sink that I feel I could install a lock on. There are 2 shelves in there that I usually keep my hair styling tools and  box full of extra things, doubles of makeup, eyelashes I haven't opened/used yet, new packets of sponges, that kind of thing.

I'm sure all of the things that are currently residing in there could be relocated or moved to the bottom shelf, freeing up the top for my nail polishes!

I'll keep you all updated with how it goes, and post pics once it's done. Tell me, how do you store your nail polish collection?

UPDATE: I got motivated and did the under-sink storage immediately after I posted this blog. Here's the result:

Glitter polishes at the back, then nail art stripers, then metallics, top and base coats up one side, and crackle/shatter finishes up the other, then organized by colour.

I'm still not 100% happy with the way it's organized, but it's definitely better than the bag they were all rolling around in.

Monday, 28 January 2013

Sneak peek: OPI Great and Powerful Oz collection.


 I have loved all things Oz since I was a little girl, so when OPI released their new Great and Powerful Oz collection, I will admit I did a little happy dance and made  little squee noise.

Even better than the fact that they are Oz inspired, is the fact that every shade in the collection is classy and wearable with pretty much everything.

From white, to nude, to pink, silver, gold and all the sparkle of confetti polishes, it's a really lovely collection.

These are the kind of colours you could make work for any occasion, so for me, they are a must-have collection for any nail polish lover!


 The two confetti polishes feature in silver and gold, and would add just the right amount of sparkle to any party outfit.


The best part is the very last colour you see here, "What wizardry is this?", which is one of OPI's new Liquid Sand polishes, which provides a matte finished, 3D "sand" look on the nail and is a really awesome feature. Stay tuned for some great looks I'll be putting together very soon with OPI's Liquid Sand polishes.

Thursday, 24 January 2013

Review: BYS 3D Nail art polish

 Browsing around Gloss the other day, I picked up this awesome little gem. I covered it a little bit in my Monday how-to post this week, but I'll go into a bit more detail on it now.

It's basically a glitter polish, but the glitter is really, really chunky.

It takes a bit of patience, but when you get enough coats on there, it's a really awesome look that will last for ages.

To make it look like it does below, you need to start with a base of colour. I used a blue from the OPI Texas collection. Then I did 4 coats of the 3D polish, then topcoat, waiting for each coat to dry before adding more.

It's the kind of nail stuff to do while you're watching a movie, or have a good half hour of quiet time.

I think you'll agree that the effect is well worth the extra time.


Wednesday, 9 January 2013

Trendsday: Lips'n'tips

Colour blocking is officially done, over with, goneski from the trends of 2013.

What's stepping into its place? The old "Lips'n'Tips" from the 50's! Matching lipstick to your nail and toenail polish for a refined look.

I, personally, couldn't be happier! I loveovelove anything retro that dates back to the 40's and 50's, and this is no exception.

Two notable brands who have hopped onto this trend right from the start, and they have both released lips'n'tips packs so we don't have to go searching for perfectly matched lipglosses and nail polishes.

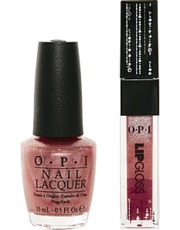
OPI and Butter London have got some really gorgeous matchy-matchy colours for us to try. I was checking the OPI ones out this week in my local beauty supply store and I am having a hard time choosing just one. It may need to be a double feature!

I'll pop a review up once I have tried them out. I haven't tried lipgloss from OPI, but I did used to use their Avoplex lip treatment before they discontinued it, and LOVED it.

What do you think of the new lips'n'tips trend?


Monday, 7 January 2013

How-to Monday: Tigger nails!!!

Here's something really cute that I stumbled across on Instagram and decided to try myself. It's such a simple technique, and the result is awesome and everyone who has seen it on me absolutely loves it. Even the man in my life said " I LOVE that!" when he saw it.

First, here's the tutorial that I filmed and posted to YouTube, which shows you how to do it:


Or, here's the step by step instructions:

 Step 1: Base coat.

I use Revlon quick dry base coat, but you can use whichever base coat you prefer. The brands used in the tutorial are just the ones that I had in the colours that I needed.

One light coat of base coat to get you started.
Step 2: French base.

Using any baby or french pink, lightly coat your  thumb, index finger, middle finger (yes, in the video I referred to it as my "bird" finger!) and pinky finger.

Leave your ring finger without the pink coat if you're doing a full nail of Tigger like I've done. You only need the pink layer if you're doing the "french" style tips.
 Step 3: Bright orange.

I'm using a neon orange from Orly's hot shots collection.

You need 2 coats; on the full ring finger nail and just on the tips of all the other fingers, as shown in the video.

I followed the line of my acrylic tips (the white part), so it was super easy.
Step 4: Tiger stripes.

I don't know a way to do this without a striper polish, but as you can clearly see in the video, this BYS nail art polish cost me $4.50, and it's really versatile. You'll use it for so many different nail arts.

Starting at the top of the nail and only working over the orange part, begin on one side, right at the top and using the striper to work a thick line, brushing down to a thin brush stroke three quarters of the way across the nail. You'll get the hang of it as you go. The stripes don't have to be perfect.
Step 5: Finishing.

Top coat is important so that your polish doesn't chip or flake away quickly. There is a technique to this, though. Basically, you want to work from side to side on the nail, so that if the top coat happens to smudge the striper, it smudges in the direction of the stripes and doesn't ruin the art.

And that's it. It's that easy.

Do you love this look? Will you try it out?

Thursday, 3 January 2013

My nail art holiday album!

Lots of awesome nail art happened over the break, and I wanted to share some of it with you guys.

#1. Christmas tree.
#2. Gingham style.
#3. Neon madness.
#4. Winter Wonderland
 #5. Golden leopard
 #6. Hibiscus/Butterfly
 #7. Blackout.
#8. Emerald dreams.

Friday, 14 December 2012

Challenge me: Nail art!


 I'm ok with nail art. I'm a naturally creative person, and I really love to make some pretty nails for people to look at. It makes me happy.

Lately, my friend Jan has been posting pics on facebook of nail art she's seen and liked and tagged me in the pics to see if I could recreate the looks.

So what I'm thinking is, maybe you, my dear readers, could join in the challenge!

If you see a nail art that you like, post the pic on my facebook wall here: www.facebook.com/katysbeautysecrets and I'll post my recreation of the look! When I have a few to post, I'll pop the pics side by side in a blog post and we can all have a look!

You can also tag me @katylylak on Instagram and I'll see the pictures there if you happen to see something cool on there.


Saturday, 24 November 2012

OMG product: OPI Skyfall - the man with the golden gun

After some internal debate over whether to actually buy this, I'm so excited that I did, because now I can share it with you guys!
So... why am I so excited about this nail polish that arrives in its very own special box, with special gold packaging?

Because it's freakin' 18k gold top coat, that's why!

I've loved glitter top coats, I've loved shatter top coats, I've played with every kind of nail polish you could imagine...but I've never loved anything like this before. It's absolutely stunning in its effect.

This little gem is going to set you back quite a bit more than the regular OPI polishes (I buy wholesale from a beauty supply place, so I got a discount on the RRP which I think is around $40 in stores), but it's SO worth every cent.

Everyone is doing the swatching it over dark colours thing, so I thought I'd be a little bit different and do it over a cloudy blue/grey colour here:


What do you think? Are you loving this as much as I am?