It was announced officially just under a week ago, and already Urban Decay have released first pictures of the new Naked 3 palette, which features 12 rose-based neutrals, which will be absolutely perfect for me!
Speculation is that it will be available just before Christmas at the usual $50 price point. Having an awesome boyfriend in the states who I can send money to via paypal is a really handy thing, and the fact that he is coming to visit in February means that I'll be able to get my hands on this little beauty for my birthday! Aussie makeup lovers, don't despair, there are plenty of online stores who will ship to Australia, even though Urban Decay won't. ( I was hoping that once they were acquired by L'Oreal that this would change, but it apparently hasn't as yet. Let's keep our fingers crossed.)
So, now all that's left is to show you the colours......drumroll please....
Showing posts with label eyeshadow. Show all posts
Wednesday, 13 November 2013
Monday, 28 October 2013
MAKEUP YOUR EYE COLOUR.
I've been promising you guys for a while, a post to show you what the best eye makeup colours are for the major eye colours.
All of these pictures are my eyes, which are naturally green (and untouched in the purple makeup pic), but for the purposes of the makeup looks, I've retouched the eye colour in the gold/blue eyes and green/brown eyes pictures.
For blue eyes, gold or bronze colours are best. You always want to look opposite on the colour wheel for the colours that will compliment your eye colour.
For brown eyes, your best bet is green shades.

Depending on whether you have a warmer shade or a cooler shade of brown, you can push it into teal shades, or more yellowish shades.
Brown can also work well with golden tones, also depending on the individual tone of your eye colour.
Last of all, green eyes. For me, this is something I've had the opportunity to experiment with a lot, because my eyes are naturally green, with grey and blue tint, depending on my mood or what makeup I wear.
I find that the best colours to make my eyes really pop are purple tones, or a classic black smoky eye, which would work with any eye colour.
I hope this post has been helpful for you guys. If you have questions, pop me a comment down below and I'll try to answer it for you.
All of these pictures are my eyes, which are naturally green (and untouched in the purple makeup pic), but for the purposes of the makeup looks, I've retouched the eye colour in the gold/blue eyes and green/brown eyes pictures.
For blue eyes, gold or bronze colours are best. You always want to look opposite on the colour wheel for the colours that will compliment your eye colour.
For brown eyes, your best bet is green shades.

Depending on whether you have a warmer shade or a cooler shade of brown, you can push it into teal shades, or more yellowish shades.Brown can also work well with golden tones, also depending on the individual tone of your eye colour.
Last of all, green eyes. For me, this is something I've had the opportunity to experiment with a lot, because my eyes are naturally green, with grey and blue tint, depending on my mood or what makeup I wear.I find that the best colours to make my eyes really pop are purple tones, or a classic black smoky eye, which would work with any eye colour.
I hope this post has been helpful for you guys. If you have questions, pop me a comment down below and I'll try to answer it for you.
Monday, 21 October 2013
MAKEUP: AN ACT OF BETRAYAL...?
Here's a little post, just to show the dramatic effect that makeup -can- have on a face. I'm often complimented on my lovely eyes, but it's almost always when I've dressed them up with a bit of colour and pop.
So, here you can see the difference between my eyes au naturale, and with makeup, lots of eyeliner and mascara, and a very fine pair of false lashes.
I've also defined my brows in the makeup shots, which does a lot for framing the eyes and completing the look.
I'm able to mask the large scar I have on the outer corner of one eye with makeup, cover up any imperfections, lengthen my lashes and define the inner rims of my eyes to make them look slightly smaller, yet wider-set (by using a very light colour in the inner corner.
The brow bone is highlighted in white, giving extra dimension to the area, and the crease of the eyelid is darkened to create artificial depth.
This post was inspired by an article I read, which claimed that makeup was deceitful, an act of betrayal.

What do you think?
So, here you can see the difference between my eyes au naturale, and with makeup, lots of eyeliner and mascara, and a very fine pair of false lashes.
I've also defined my brows in the makeup shots, which does a lot for framing the eyes and completing the look.
I'm able to mask the large scar I have on the outer corner of one eye with makeup, cover up any imperfections, lengthen my lashes and define the inner rims of my eyes to make them look slightly smaller, yet wider-set (by using a very light colour in the inner corner.The brow bone is highlighted in white, giving extra dimension to the area, and the crease of the eyelid is darkened to create artificial depth.
This post was inspired by an article I read, which claimed that makeup was deceitful, an act of betrayal.

What do you think?
Wednesday, 25 September 2013
MAKEUP SKILLZ: EYESHADOW BLENDING AND CONTOURING
I get asked all the time what my best tips for creating a great eyeshadow look are, and without a doubt, no matter what kind of look you're trying to create, blending and contouring the eye are your best tools. They take some practice to get right, but once you've worked it out, your eyeshadow looks will look more professional, and less like a 10 year old did your makeup (much like mine used to!).
First, let's talk about blending. The trick to blending properly is having the correct tool for the job. I use Real Techniques eye brushes. The shader brush is perfect for applying the colour, then their deluxe crease brush is perfect for all those blending jobs. I got mine at Walmart and they are really, really affordable.
You should start with a crease-free eyeshadow primer, like Urban Decay Primer Potion, or even a gorgeous cream eyeshadow like Maybelline Colour Tattoo. Just make sure whatever you use isn't going to crease up under your shadow. Primer will give you a smooth canvas, and will also provide a base for the colour to stick to.
Using a flat shader brush, be sure to pat the colour onto the lid, instead of sweeping it across the eyelid, to get the best colour payoff from your eyeshadow. We'll go into what kinds of colours to use where in the contouring section later.
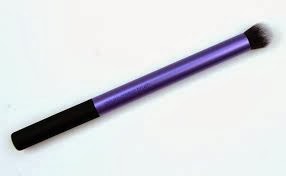
The most important thing I can tell you about blending is to ALWAYS USE A CLEAN BRUSH TO BLEND WITH. I like to keep a makeup wipe on my counter top to clean my blending brush with as I go.
Blend in small, circular motions, taking care to work on top of your shadow, and not into it. Don't press down hard, as the eye area is very delicate, and also the crease/blending brush is designed for just the tips of the fibres to be used to gently blend the eyeshadow together.The finished look should be seamless, with no harsh lines of colour anywhere. The more you blend, the smoother the look, and depending how you want your makeup to end up looking will dictate how much time you need to spend on blending it out. You can always go back in with more colour to even out your look as you blend.
Eye contouring is a really great way to create gorgeous eyeshadow looks that really pop, and the basic eye contour has become a staple of makeup culture today.
We start with the lightest colour we're going to use, highlighting under the brow bone, to give depth to the eyes, and into the inner corner, to make the eyes look slightly larger and set wider apart (if you have large, wide-set eyes, this step will be one you'll like to skip). Next, the main colour you would like to feature in the look goes in the middle of the eyelid. You can see a really great example of this in the purple look here. I also like to use this colour, or a slightly lighter tone, up into and above the crease, blending it into the brow highlight as a "transition" colour.
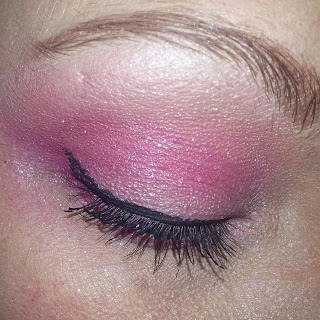
Last of all, for a simple look with eye contouring, use the darkest colour you're going to use, forming a triangular shape into the outer corner of the eye, and sweeping it up and into the crease, once again to add depth to the eyes and make them pop a little more.
Once you're done with the upper lid, depending on your look, you can also use an eyeliner brush (I prefer to use an angled push liner brush for more precise placement) to place some of your eyeshadow colour along the lower lashline. This is particularly nice if you're going for a nice smoked-out look.
Apply eyeliner and mascara as you wish, and your eyeshadow look is done!
A couple more tips now, to deal with fallout (powder falling from the brush as you use it, onto your cheeks).
If you're using really powdery shadows that do fallout a lot, start with your eye makeup, then do a cleanup with makeup wipes and apply the rest of your face. This isn't hard to do, and once you've tried it a couple of times, you'll find it easy.
Alternately, if we're just dealing with a tiny bit of fallout, use a large, soft brush to gently brush the powder away, being careful not to streak it all over your face. If you do happen to make a mess of it, you can always use makeup remover wipes to clean up and simply reapply makeup over the area.
Practice, practice, practice! It's only makeup! It washes off. If you mess it up you can try again. That's one of my best things about makeup, and why I love it so much. You can do anything you want to do, create anything you want to create, and at the end of the day, the canvas is clean to start again!
First, let's talk about blending. The trick to blending properly is having the correct tool for the job. I use Real Techniques eye brushes. The shader brush is perfect for applying the colour, then their deluxe crease brush is perfect for all those blending jobs. I got mine at Walmart and they are really, really affordable.
You should start with a crease-free eyeshadow primer, like Urban Decay Primer Potion, or even a gorgeous cream eyeshadow like Maybelline Colour Tattoo. Just make sure whatever you use isn't going to crease up under your shadow. Primer will give you a smooth canvas, and will also provide a base for the colour to stick to.
Using a flat shader brush, be sure to pat the colour onto the lid, instead of sweeping it across the eyelid, to get the best colour payoff from your eyeshadow. We'll go into what kinds of colours to use where in the contouring section later.
The most important thing I can tell you about blending is to ALWAYS USE A CLEAN BRUSH TO BLEND WITH. I like to keep a makeup wipe on my counter top to clean my blending brush with as I go.Blend in small, circular motions, taking care to work on top of your shadow, and not into it. Don't press down hard, as the eye area is very delicate, and also the crease/blending brush is designed for just the tips of the fibres to be used to gently blend the eyeshadow together.The finished look should be seamless, with no harsh lines of colour anywhere. The more you blend, the smoother the look, and depending how you want your makeup to end up looking will dictate how much time you need to spend on blending it out. You can always go back in with more colour to even out your look as you blend.
Eye contouring is a really great way to create gorgeous eyeshadow looks that really pop, and the basic eye contour has become a staple of makeup culture today.
We start with the lightest colour we're going to use, highlighting under the brow bone, to give depth to the eyes, and into the inner corner, to make the eyes look slightly larger and set wider apart (if you have large, wide-set eyes, this step will be one you'll like to skip). Next, the main colour you would like to feature in the look goes in the middle of the eyelid. You can see a really great example of this in the purple look here. I also like to use this colour, or a slightly lighter tone, up into and above the crease, blending it into the brow highlight as a "transition" colour.
Last of all, for a simple look with eye contouring, use the darkest colour you're going to use, forming a triangular shape into the outer corner of the eye, and sweeping it up and into the crease, once again to add depth to the eyes and make them pop a little more.Once you're done with the upper lid, depending on your look, you can also use an eyeliner brush (I prefer to use an angled push liner brush for more precise placement) to place some of your eyeshadow colour along the lower lashline. This is particularly nice if you're going for a nice smoked-out look.
Apply eyeliner and mascara as you wish, and your eyeshadow look is done!
A couple more tips now, to deal with fallout (powder falling from the brush as you use it, onto your cheeks).
If you're using really powdery shadows that do fallout a lot, start with your eye makeup, then do a cleanup with makeup wipes and apply the rest of your face. This isn't hard to do, and once you've tried it a couple of times, you'll find it easy.
Alternately, if we're just dealing with a tiny bit of fallout, use a large, soft brush to gently brush the powder away, being careful not to streak it all over your face. If you do happen to make a mess of it, you can always use makeup remover wipes to clean up and simply reapply makeup over the area.
Practice, practice, practice! It's only makeup! It washes off. If you mess it up you can try again. That's one of my best things about makeup, and why I love it so much. You can do anything you want to do, create anything you want to create, and at the end of the day, the canvas is clean to start again!
Saturday, 17 August 2013
Mini Chi Chi haul and makeup look
Today I went to Gloss to "try out" my visa load and go travel card for when I go to Texas, and I had no idea what I was going to buy.....until I saw the big sign that said "50% OFF SELECTED CHI CHI PRODUCTS!!!!"
It was decided at that point that I would like to spend a little bit of money and pick up a few chi chi products. I have a couple of things from the brand, but haven't really tried out much of their stuff. Now I have a gorgeous green eyeliner in "Glamazon", a to-die-for pink matte creme lipstick in "Flirt", a shimmery awesome metallic eyeshadow crayon in "Barbarella", and my favourite item, an absolutely gorgeous eyeshadow quad in "Paparazzi Princess".
With the exception of the green eyeliner, I later decided that they would make a really gorgeous, understated makeup look, which I have created here for you. If you guys want to see a tutorial of this look, please let me know, and I'll make a video either while I'm away, or when I get back.
Let's have a closer look at the products I used in the makeup look:
Metallic eyeshadow crayon in "Barbarella".

This is a fantastic product either for an eyeshadow base, to highlight the inner corner, or even blended out as an under-brow highlight. It has a beautiful gold sheen, but isn't overpowering. It's an awesome team player for any makeup look.

Viva la Diva matte lipstick in "flirt"
This lipstick is my ideal. It's the perfect shade of pink, its creme finish is so comfortable and luxurious-feeling on the lips, and it has a matte finish to die for. I can really see this becoming my go-to lip product once Liptember is over. I loveloveLOVE the packaging. It's really beautifully designed, and the lipstick closes really solidly, the lid clicking into place and reassuring you that you won't find your awesome lippie smeared all over the inside of your handbag.

Last of all, my very favourite of the haul, my new eyeshadow quad in "Paparazzi Princess". The colours are stunning, a perfectly put-together quad for me. I love the gold and pink shades, and they really suit my skintone. There's enough highlight and shadow here to create a really multi-dimensional look, but it's still simple enough for daytime wear. This is a really great all-purpose palette, and I see myself using it for daytime looks, night time looks, and special date makeup.
My look was completed using my normal foundation products and eyeliners/mascaras, but I did use the light pink eyeshadow from this quad as a blush and the lightest colour as a highlight. I think it really lends itself to the multi-purpose very well.
I'm definitely a new chi chi (prounced "she-she", with a french accent) devotee, and I even changed my Sephora budget for when I'm in the states to accommodate more chi chi purchases when I return. I have my eye on their mosaic blushes and their gorgeous foundations, which come in a really awesome range of shades.
Check them out at Myer, Target and Gloss!
It was decided at that point that I would like to spend a little bit of money and pick up a few chi chi products. I have a couple of things from the brand, but haven't really tried out much of their stuff. Now I have a gorgeous green eyeliner in "Glamazon", a to-die-for pink matte creme lipstick in "Flirt", a shimmery awesome metallic eyeshadow crayon in "Barbarella", and my favourite item, an absolutely gorgeous eyeshadow quad in "Paparazzi Princess".
With the exception of the green eyeliner, I later decided that they would make a really gorgeous, understated makeup look, which I have created here for you. If you guys want to see a tutorial of this look, please let me know, and I'll make a video either while I'm away, or when I get back.
Let's have a closer look at the products I used in the makeup look:
Metallic eyeshadow crayon in "Barbarella".

This is a fantastic product either for an eyeshadow base, to highlight the inner corner, or even blended out as an under-brow highlight. It has a beautiful gold sheen, but isn't overpowering. It's an awesome team player for any makeup look.

Viva la Diva matte lipstick in "flirt"
This lipstick is my ideal. It's the perfect shade of pink, its creme finish is so comfortable and luxurious-feeling on the lips, and it has a matte finish to die for. I can really see this becoming my go-to lip product once Liptember is over. I loveloveLOVE the packaging. It's really beautifully designed, and the lipstick closes really solidly, the lid clicking into place and reassuring you that you won't find your awesome lippie smeared all over the inside of your handbag.

Last of all, my very favourite of the haul, my new eyeshadow quad in "Paparazzi Princess". The colours are stunning, a perfectly put-together quad for me. I love the gold and pink shades, and they really suit my skintone. There's enough highlight and shadow here to create a really multi-dimensional look, but it's still simple enough for daytime wear. This is a really great all-purpose palette, and I see myself using it for daytime looks, night time looks, and special date makeup.My look was completed using my normal foundation products and eyeliners/mascaras, but I did use the light pink eyeshadow from this quad as a blush and the lightest colour as a highlight. I think it really lends itself to the multi-purpose very well.
I'm definitely a new chi chi (prounced "she-she", with a french accent) devotee, and I even changed my Sephora budget for when I'm in the states to accommodate more chi chi purchases when I return. I have my eye on their mosaic blushes and their gorgeous foundations, which come in a really awesome range of shades.Check them out at Myer, Target and Gloss!
Friday, 3 May 2013
Trend Alert: Pastel/Coloured smokey eye makeup.

I've been waiting for this trend to emerge since the smokey eye became really popular again, and it hasn't disappointed me.
Lately in the media, I'm seeing a whole heap of different coloured smokey eyes, and it seems to be pastel-colour bases that are making a really big statement.
The big secret when it comes to eye makeup, and the smokey eye in particular is proper blending. You need to make sure you always have a clean brush handy, preferably of the "fluffy" variety. (If you don't know what a fluffy blending brush looks like, refer below)
For this look, I used a sillver base from my Chanel palette, then a variety of different pastel blue and teal colours from my 120 pro palette, and last of all, "Rockstar" by Urban Decay (smoked palette) in my outer corner and crease to smoke it all out and deepen the look.
I used my Essence blue eyeliner on the bottom lid, and my Australis curve ink liner on my upper lid, then topped it all off with lashings of MAC Plushlash mascara.
What do you think of this new trend? Do you want to see me do a different colour (pink, or purple, perhaps)? Would you wear this look? Do you want to see a tutorial for this look?
![]() |
| MAC 224 blending brush |
-->
Thursday, 4 April 2013
Makeup look: ChiChi real minerals loose pigment quad

When I was in Target last week, i managed to pick up a ChiChi real minerals eyeshadow quad in these amazing greens, and I thought I would share the look with you guys.
Green is one of my favourite colours to use on my eyes, and I really love the depth that can be achieved by building and layering a look to suit a certain event or season. Green reminds me of springtime, so for the aussies among us who are heading into autumn and winter, it can be a bit of a pick-me-up, with the grey skies outside.
Below, I've swatched the colours on my arm. I basically just swatched them with my finger, onto my bare arm with no eyeshadow base underneath.
Using a base like Too Faced Shadow Insurance or Urban Decay Primer Potion will intensify the colours, prevent creasing and make them wear longer and stronger.
There are two colours that are more sheer, and two more vibrant ones with a better colour payoff. I used the lightest colour as a highlight up under the brow bone, then the second sheer colour all over the lid. I was going for a slightly more subtle look than you -could- go for with these colours, so i then just swept the darker green into the outer corner and up across the crease for a little added depth.I used a green eyeliner crayon from essence along my top and bottom lashlines, and finished it all off with a good coat of MAC Plushlash.
I really love the colours in this quad, and I can definitely see using them often. The only drawback with these pigments is the packaging, which is quite messy and awkward to use. It means that you waste product every time you use it, and I don't like to waste things.I'm thinking of maybe modifying the existing packaging, or perhaps I'll depot into more user-friendly containers so that I can use them without the mess and waste.
The texture of the mineral powders is lovely, and they build really nicely. I can't wait to try out some more looks with these shadows!
-->
Thursday, 28 March 2013
Makeup look: A splash of colour for Autumn or Spring!
Today I decided to do a bit of a crazy addition to my usual nude-toned eye makeup.
In my March LHI box, I received 2 green skin crayons, and I have been hanging to do something with the bright lime one in particular.
I achieved this pop of colour by just simply lining my lower waterline and lashline with the bright green pencil, which goes on really creamy and lovely.
For my everyday nude look, I use my Urban Decay Naked 2 palette, first using "Foxy" all over the lid, right up to the brow, then "Tease" in the middle of the eyelid and up over the crease as a transition colour. Blend in well with the highlight.
Next, I use "Verve" in my inner third, blending it back into the "tease" colour.
Last of all, "Busted" goes in the outer third and along the crease, then I blend everything together nicely.
Using Australis Curve Ink liquid eyeliner, I create a slight winged look, and top it all off with MAC Plush Lash mascara.
You can add a splash of any colour you like to make this a more seasonal or fancy themed makeup look.
-->
In my March LHI box, I received 2 green skin crayons, and I have been hanging to do something with the bright lime one in particular.
I achieved this pop of colour by just simply lining my lower waterline and lashline with the bright green pencil, which goes on really creamy and lovely.
For my everyday nude look, I use my Urban Decay Naked 2 palette, first using "Foxy" all over the lid, right up to the brow, then "Tease" in the middle of the eyelid and up over the crease as a transition colour. Blend in well with the highlight.Next, I use "Verve" in my inner third, blending it back into the "tease" colour.
Last of all, "Busted" goes in the outer third and along the crease, then I blend everything together nicely.
Using Australis Curve Ink liquid eyeliner, I create a slight winged look, and top it all off with MAC Plush Lash mascara.
You can add a splash of any colour you like to make this a more seasonal or fancy themed makeup look.
-->
Friday, 22 March 2013
Katy Perry Peacock inspired eye makeup.
You guys know I've been working out a lot lately, and I've just figured out my technology enough to run my tracker app and my music on the phone at the same time! So I love nothing better than to pop in my headphones and pound the pavement to a selection of songs with a tempo >120bpm.
One such song (with a very cheeky, naughty lyrical line) is Katy Perry's "Peacock", and it's been in high rotation on my playlist because I particularly enjoy it.
How better to express my appreciation for Katy's hit song than to pay tribute to it with a makeup look?

I started with Urban Decay Primer Potion in Greed, and a chunky eyeshadow crayon in a pearly pink colour and covered my lid entirely, leaving it a little thicker up under the brow for a highlight.
Then I went in with an emerald green with sparkles to the middle third of the lid, pushing the colour up and across above the brow bone to the outer corner of my eye.
My inner corner is a matte mint green colour, which I used in the inner corner, just under the eye in the inner third, and blended out between the highlight under my brow and the emerald green.
Last of all, a lovely sapphire blue colour swept across the outer V into the lid, up from the lashline to create a feathery look.
I used teal and blue pencil liners on my waterline, and black liquid liner (my trusty Australis curve ink liner) on the lid.
Last of all, a generous helping of mascara and Ibiza lashes from Hedkandi by Eylure, and I was all done!
What do you think? What events do you have coming up where this might be a good look?
-->
One such song (with a very cheeky, naughty lyrical line) is Katy Perry's "Peacock", and it's been in high rotation on my playlist because I particularly enjoy it.
How better to express my appreciation for Katy's hit song than to pay tribute to it with a makeup look?

I started with Urban Decay Primer Potion in Greed, and a chunky eyeshadow crayon in a pearly pink colour and covered my lid entirely, leaving it a little thicker up under the brow for a highlight.
Then I went in with an emerald green with sparkles to the middle third of the lid, pushing the colour up and across above the brow bone to the outer corner of my eye.
My inner corner is a matte mint green colour, which I used in the inner corner, just under the eye in the inner third, and blended out between the highlight under my brow and the emerald green.
Last of all, a lovely sapphire blue colour swept across the outer V into the lid, up from the lashline to create a feathery look.
I used teal and blue pencil liners on my waterline, and black liquid liner (my trusty Australis curve ink liner) on the lid.
Last of all, a generous helping of mascara and Ibiza lashes from Hedkandi by Eylure, and I was all done!
What do you think? What events do you have coming up where this might be a good look?
-->
Tuesday, 19 February 2013
BARGAINS! Another awesome DCC haul!
And it's all eyeshadow this time!
There have been some really great deals lately from Dollar Cosmetics club, and I've been particularly interested in picking up some great quality eyeshadows in particular, for very little cost.
For those of you who haven't read my other posts about Dollar Cosmetic Club and Cosmetic Corner, they are basically a very cheap way to purchase quality cosmetics. Sometimes, they are really high end brands for as little as $1.

Take for example, this Lancome eyeshadow quad.This is a very high end brand, in good, relevant colours, for the very affordable price of $1! I got two of these, and gave one to my mother, who was very grateful, and including the $5 shipping charge, they set me back a whopping $7. Total. Exactly the same deal was had on the L'Oreal Project Runway quads pictured above. Those ones I received in two different colours, which is always a good thing, but not always a guaranteed thing. You don't get to choose your colours, but I've never had a product from DCC that I couldn't use, or that I thought was really awful.
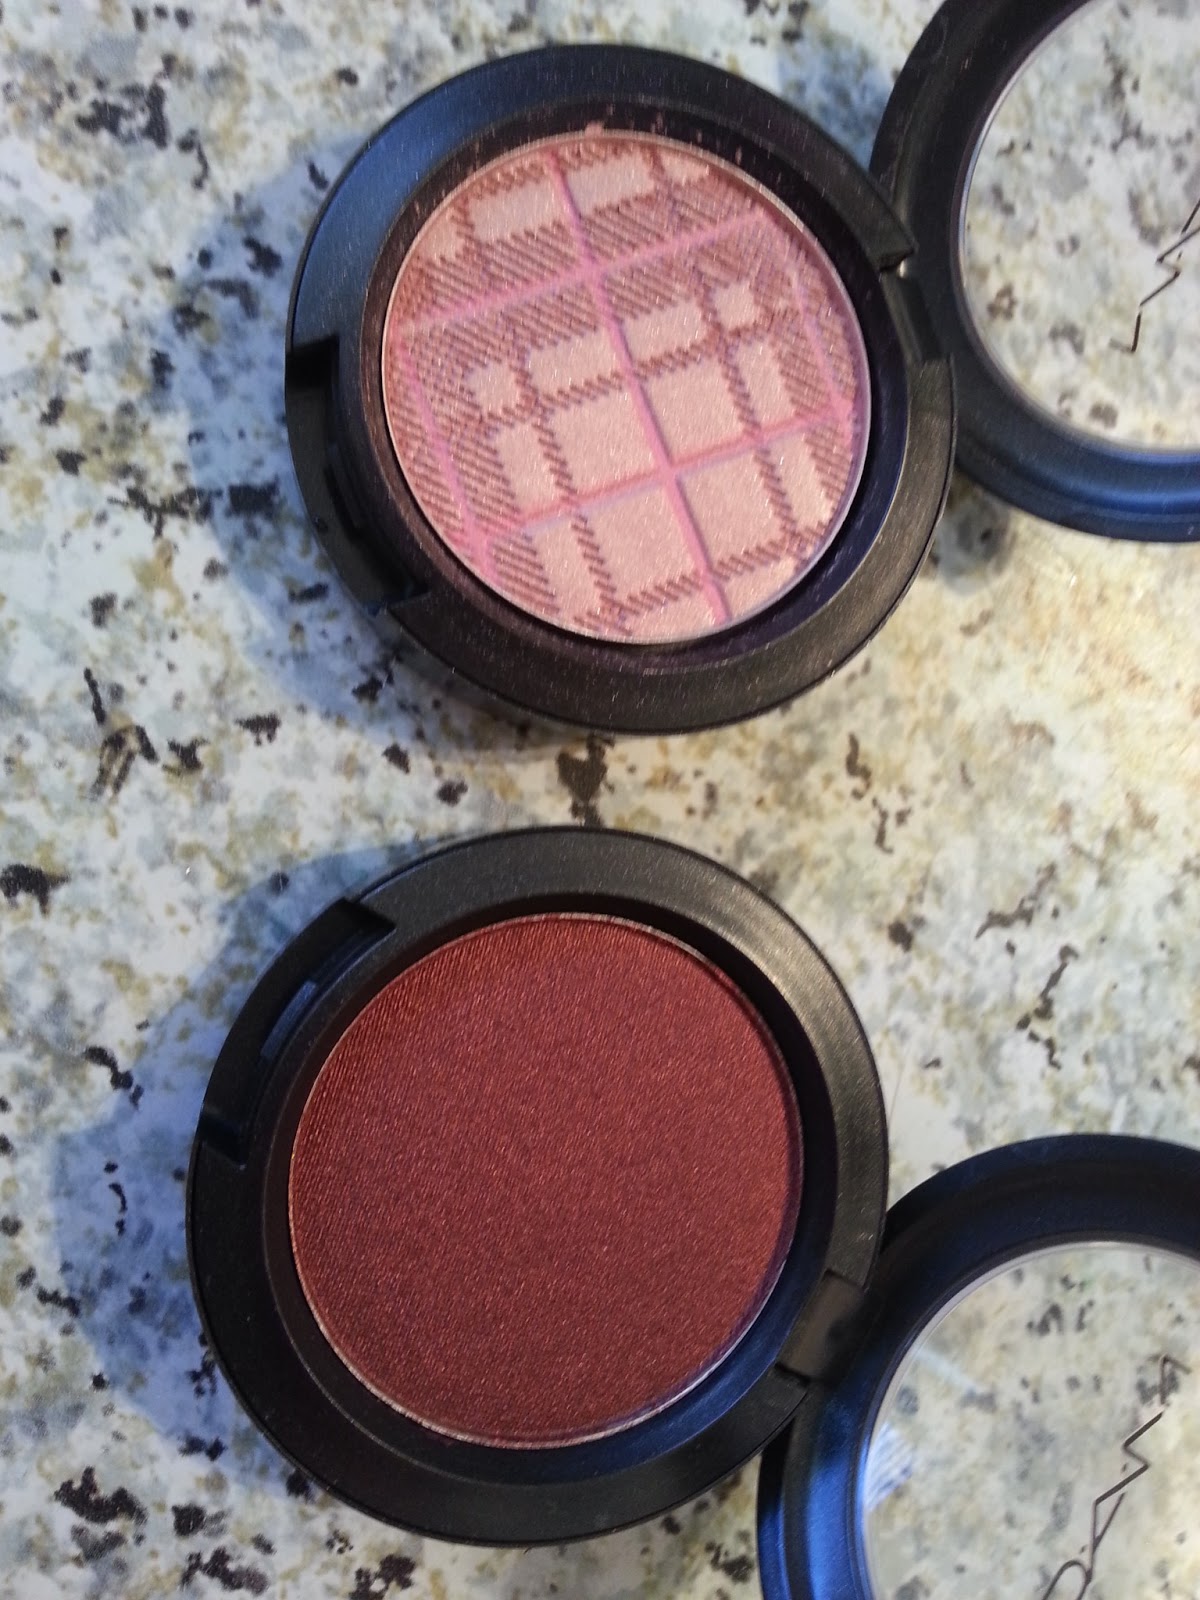
Last of all, there's my bargain buy from their other company, Cosmetic Corner. They have a store online where you can buy what you want from several high end and pharmacy brands at really affordable prices (like my Elizabeth Arden Eyeshadow quad, for example). I picked up these two MAC eyeshadows for about half the usual cost in store, and I chose my colours from what they had in stock. I plan to do a makeup look based around these colours next week, so stay tuned for that one.
They also have some really super cheap makeup packs on offer at Cosmetic Corner. Well worth a look.
Check them out:
www.dollarcosmeticclub.com.au
and
www.cosmeticcorner.com.au
Thursday, 31 January 2013
Review: BYS custom colours eyeshadows.
I've seen these little pans and palettes around for years, and I've always loved them. In my early "getting serious about makeup" days, I had several of these palettes with similar colours in them, or colours that went well together. They used to have them with cute art on the outside, but now I can only find the black ones.
Anyway, they are the BYS custom colours palette and pan sets, and basically you buy the palette empty and then fill it with colours of your choice, that fit magnetically into the pan!
They have a cute, but functional sized mirror inside, so they are perfect for beauty on the go.
Over christmas (and even still now, at a heavily reduced price!), I saw these sets with a palette and 10 shadow pans, which are really great value.
The palette I've put together here is perfect for creating a pink-based smoky eye look. My camera hasn't really picked up the colours very well here, but the lighter pink is more of a baby pink, perfect for highlighting under the brow, then there's the deeper pink, which I'd put on the lid and right up into transition, then the light grey I would blend into the crease and transition, and of course the charcoal for the outer corner and crease.
I really love the design, and the available colours are awesome.
What do you think? Would you love to make up your own palettes?
Thursday, 17 January 2013
Review: Rimmel Stir It Up Cream Eyeshadow
I was browsing through Gloss the other day, and I stumbled across these Rimmel cream eyeshadows, and fell in love!
There were 7 or 8 different colours, and at just under $5 each, I was tempted to get them all, but I listened to my inner thrifty person and just chose 2.
I ended up with #400 - Out of the blue, and #300 - Sure. Both of these colours are gorgeous and I can think of a bunch of different ways to use them.
First of all, let's have a look at the colours swatched on my arm. The blue one, of course, is Out of the blue, and the bronzey-pink-purple is Sure. I love both colours. The blue/green would be amazing for a mermaid-y kind of look, and the pink will be fantastic for a faerie event we have coming up in Melbourne.
When I first picked them up, I thought that they were powders, so of course, I got a huge surprise when I stuck my finger in the tester!

They go on very smooth and don't crease, so I think that they would also make a really awesome base colour for a really intense makeup look, if you had an event that you could get away with massive makeup for. Remember, though, if you're going all out with the eyes, you probably want to keep the lips natural-looking to avoid a massive makeup faux-pas.
I lovelovelove these, and I highly recommend that you go check them out for yourself! Like I said, you can get them from Gloss, or from Priceline, Kmart, Target, Big W, Coles supermarkets & selected pharmacies nationally.
There were 7 or 8 different colours, and at just under $5 each, I was tempted to get them all, but I listened to my inner thrifty person and just chose 2.
I ended up with #400 - Out of the blue, and #300 - Sure. Both of these colours are gorgeous and I can think of a bunch of different ways to use them.
They go on very smooth and don't crease, so I think that they would also make a really awesome base colour for a really intense makeup look, if you had an event that you could get away with massive makeup for. Remember, though, if you're going all out with the eyes, you probably want to keep the lips natural-looking to avoid a massive makeup faux-pas.
I lovelovelove these, and I highly recommend that you go check them out for yourself! Like I said, you can get them from Gloss, or from Priceline, Kmart, Target, Big W, Coles supermarkets & selected pharmacies nationally.
Friday, 30 November 2012
Special edition Elizabeth Arden Go Red for Women eyeshadow quad!
Today I received a few things in the mail, which you'll see a lot more of in the next few days, but I was really super excited about this one, and I just had to share it with you guys!
This is a special edition Elizabeth Arden eyeshadow quad in Neutral Cashmeres, and it's Go red for women, which raises awareness of heart disease and stroke in women.
First of all, let's just take a moment to swoon over the packaging. It's art inspired by a 14 panel mural the Miss Elizabeth Arden had commissioned in 1935 to celebrate the universal beauty of women throughout the ages. This picture signifies the "modern" beauty in the 1930s, and I just adore it!
Inside are four neutral/pink-brown shades of eyeshadow which are all beautiful, buttery in texture and apply easily and beautifully with a brush and sponge applicator included.
I feel like this is a take-anywhere compact that you can construct an entire eye look from easily, using only these four shades to create the on-trend nude smoky eye.
I've swatched them on my arm below, starting in the top left, then top right, then bottom left and bottom right. The dark brown is really matte and could also be used for contouring in a pinch.
Now...the best part.
This compact retails at $58, but I was browsing through www.cosmeticcorner.com.au and I found this for $13.55
No, that's not a typo. $13.55(AU). They have some beautiful high end product on super sale there and you'd be crazy not to at least go and have a look. This, and the Calvin Klein lipgloss that arrived in the same package today are both legitimate, for real, actual product, not cheap knock-offs and they are amazing value!
Go and check it out, you won't regret it, I promise!
In the meantime, have a little drool over my gorgeous eyeshadow compact and stay tuned for an eye makeup tutorial soon!
This is a special edition Elizabeth Arden eyeshadow quad in Neutral Cashmeres, and it's Go red for women, which raises awareness of heart disease and stroke in women.
First of all, let's just take a moment to swoon over the packaging. It's art inspired by a 14 panel mural the Miss Elizabeth Arden had commissioned in 1935 to celebrate the universal beauty of women throughout the ages. This picture signifies the "modern" beauty in the 1930s, and I just adore it!
Inside are four neutral/pink-brown shades of eyeshadow which are all beautiful, buttery in texture and apply easily and beautifully with a brush and sponge applicator included.I feel like this is a take-anywhere compact that you can construct an entire eye look from easily, using only these four shades to create the on-trend nude smoky eye.
I've swatched them on my arm below, starting in the top left, then top right, then bottom left and bottom right. The dark brown is really matte and could also be used for contouring in a pinch.
Now...the best part.
This compact retails at $58, but I was browsing through www.cosmeticcorner.com.au and I found this for $13.55
No, that's not a typo. $13.55(AU). They have some beautiful high end product on super sale there and you'd be crazy not to at least go and have a look. This, and the Calvin Klein lipgloss that arrived in the same package today are both legitimate, for real, actual product, not cheap knock-offs and they are amazing value!Go and check it out, you won't regret it, I promise!
In the meantime, have a little drool over my gorgeous eyeshadow compact and stay tuned for an eye makeup tutorial soon!
Subscribe to:
Posts (Atom)


.jpg)


.jpg)